

Here are five hacks that can help you use Google Colab efficiently.

Google Collab is a boon for coders as now they can do coding without buying a high-performance computer. This can be done as Google allows users to type code via the browser. They just need to sign in to their Google account. Google provides free access to GPUs and TPUs as users can access these through the cloud. Therefore no configuration is required and they can easily share their codes with their teammates. Collab is used by Google for its data analysis. Now, Google has released this to the public to make coding easy and cost-efficient. With this software, developers can easily achieve their machine-learning tasks. After its release, this is used by students who can’t afford heavy GPUs and also an opportunity to run their Data Science Experiments. Students can also access free resources provided by Google. But this software also has some flaws as it also pressures the processors and might affect the storage of your device. To make your work easier, here are five hacks that you can use to make your work efficient and hassle-free. Let’s take a look at these hacks
5 Efficient Hacks That Will Make Your Work Easy
Though Google Collab has made a revolutionary release this launch has affected developers in a different way as they might get storage issues or other issues that may slow their work or might even cause lag while coding. To make your computer efficient here are five hacks that will make your computer efficient. These five hacks are mentioned below.
Increase RAM size of Google Colaboratory
After signing in to Google Collab you get 13 GB RAM. This RAM is enough but sometimes this RAM becomes less and causes lag while coding. But, Google has given a feature that can increase the RAM size of your site and help in efficient coding. You can increase your RAM size by following this simple workaround. Here is what to do:
1. First, crash Google Colab by typing this code by typing i = []
while(True):

i.append(‘a’)
And then wait for Google Colab to crash.
- This will prompt a box below on the screen with a message and an option of “ Get More RAM”

- Click on “ Get more RAM”

- Confirm the process by clicking on “Yes”
This will double the RAM size on your system and now you can efficiently continue your coding.
Prevent Google Colab From Getting Disconnected
Google Colab disconnects the notebook if you keep your screen idle for more than 30 minutes. This is frustrating as you need to type the codes again if you have not saved your work. For this, you can use one trick that will solve this flaw and make your work easier. Let’s see what that trick is and also see the walkaround for the trick:
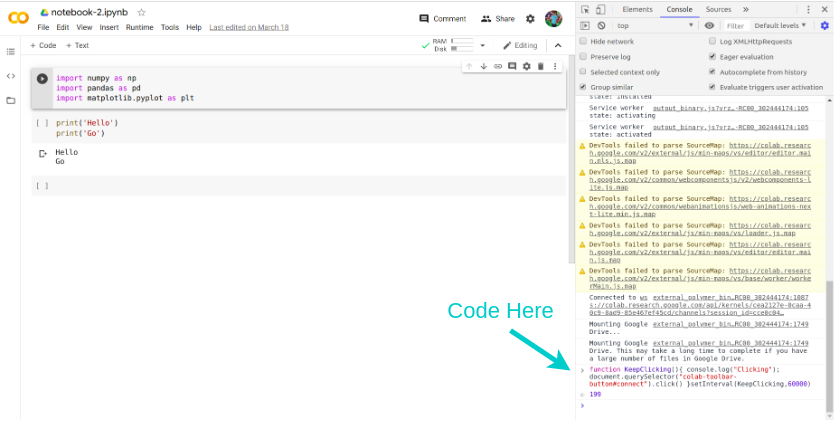
- Just open Google Chrome DevTools and then press F12 or Ctrl+Shift+I if you are using Linux and run the following Java Script.
function KeepClicking(){
console.log(“Clicking”);
document.querySelector(“colab-toolbar-button#connect”).click()
}setInterval(KeepClicking,60000)
Here 60000 means milliseconds so, 60000 means 60 seconds or 1 minute. This means that this command will automatically click the screen after every minute. This will make Google colab think that the screen is not idle and you can type your code and complete it anytime and save the whole code in one single folder.
Save Your Snippets
For a beginner level developer remembering codes might be difficult and also this mistake can cost a lot as it may crash a program. But Google has saved you from this mistake as now, you can save your Syntax in your Notebook. This will help you remember the syntax and also keep your motivation to learn coding in data science alive. You can save your Syntax by following this simple method mentioned below:
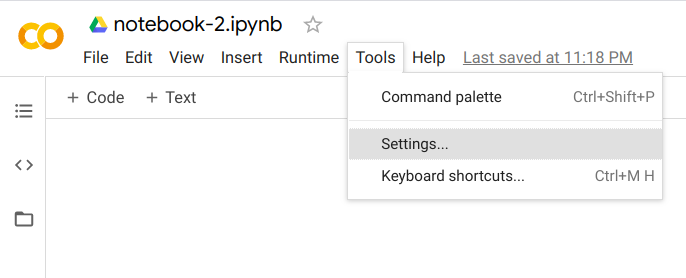
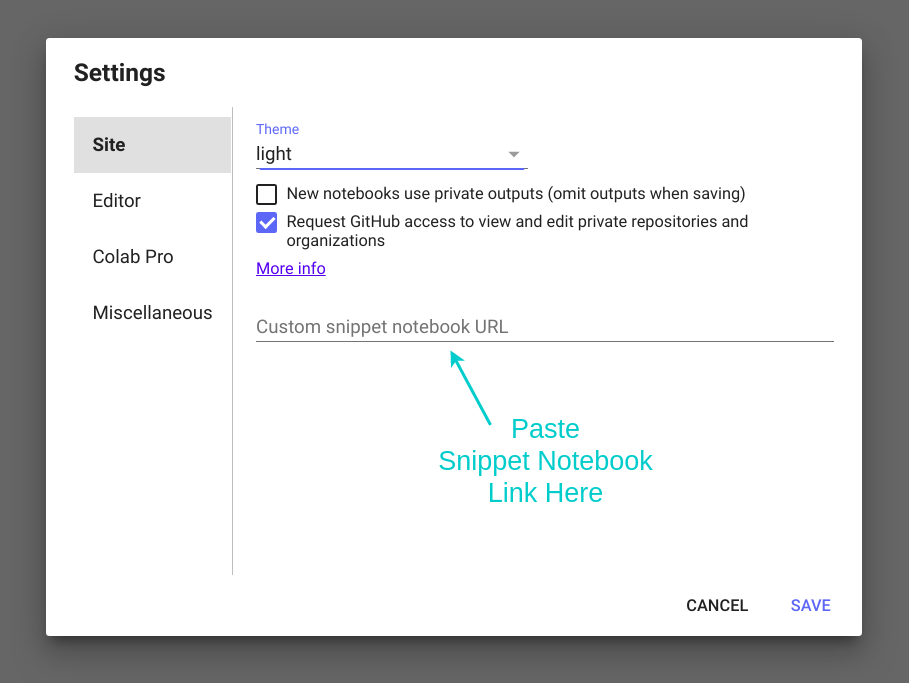
- Go to the “Tools” section and click on “Settings”.
- Paste the Snippet Notebook link in the “Custom Snippet Notebook URL” section.
- Now, click on “Save”.
- If you want to insert your snippet then you simply need to search by typing the name of the snippet.
Activate GPU and TPU
Google Colab’s default hardware is CPU but if that’s not enough for you to work on then you can activate GPU or TPU to support more complex processes like deep learning and furthermore. This can be done by following these steps:
- Click on the “Edit” section and then, select “Notebook Settings”.
- From the drop-down menu select the available option and click save.
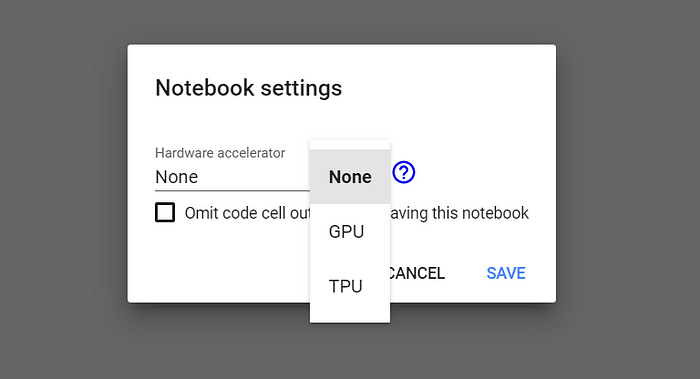
This is how you can activate GPU and TPU on your computer and smoothly run other learning processes that need some high performance.
Use Local Runtime
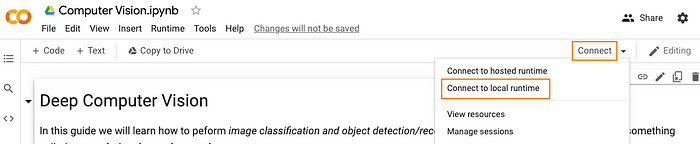
Source: Towards Data Science
Google Colab gives access to all the free GPU resources. But, if your computer has a GPU then you can use that too by changing to local runtime. This can be done by just clicking on “Connect” and then selecting “connect to local runtime”. Through this, you can run codes using your GPU and also access your local files without leaving the Colab notebook.
Download Kaggle Dataset into Colab
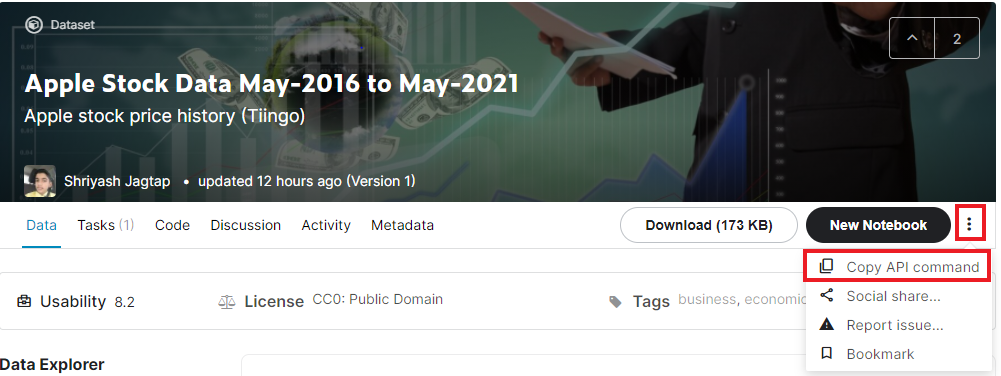
If you are using a computer with no GPU or less GPU then Kraggle is the solution as you can seamlessly download any dataset directly into Colab. For this, you can follow these steps:
- After downloading the dataset from Kraggle.
- Click on “Create New API Token”.
Source: Analytics Vidhaya
- In your Drive create a folder named “Kraggle” and save the “Kraggle.json” in it.
- Now, mount the drive in Colab Notebook change the config path to “Kraggle. jason” and change the current working directory by typing this
import os
os.environ[‘KAGGLE_CONFIG_DIR’] = “/content/drive/My Drive/Kaggle”
%cd /content/drive/MyDrive/Kaggle
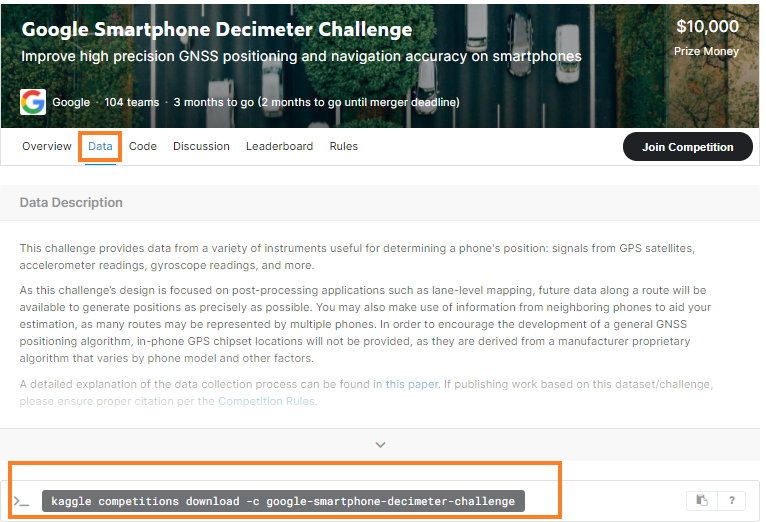
- Now, to copy the dataset that is to be downloaded you need to copy the command.
- The API will be available under the “Data” section.
- To download you need to run one of the following commands:
!Kaggle datasets download -d alexanderbader/forbes-billionaires-2021-30
!kaggle competitions download -c google-smartphone-decimeter-challenge
That’s it you can access the Kraggle data set directly from your cola notebook and proceed with your workings. There are other methods like uploading your code file to your drive to make your coding process smooth. You can also change the mode of Colab from different mode options available in the settings of the software. You can also change the background color of your dashboard from a light theme to a dark theme according to your working time and lighting conditions. There is a feature of Data Extension that can convert panda dataframes into interactive displays that are sorted, filtered, and examined. You can also have a comparison between the two notebooks and see if anything is missing or anything needs to be added. You can also visualize your data by using a feature called TensorBoard that visualizes data.
These are some of the hacks that you can try in order to work more efficiently using Google Colab and also practice coding without upgrading or using a high-performance device. This has a vast amount of features for data science students and professionals to make their work easy and smooth and also a wide area to access your codes and review them from any device. It has also made sharing your codes easy as one just has to click on share and select the recipient.